Friday, December 17, 2010

Filled with Love


Valentine's Day is the second biggest holiday for sending cards, and during the Filled with Love promotion, you can get an exclusive package of Designer Series Paper perfect for creating cards for family, friends, classmates, and more!


From December 17, 2010 through January 24, 2011, get a FREE package of Bitty Buttons--a $4.95 value--when you purchase an exclusive Filled with Love Bundle.


Click here to download the flyer and see the details.


Thursday, June 17, 2010

Birthday Cupcakes

I liked this card by Tawnya Bonnell so well that I had to try it for myself.  I did change the colors a little bit so that it was made with current supplies.


Card Recipe:

  • Stamp Sets:  Crazy for Cupcakes, Tiny Tags
  • Cardstock:  whisper white, real red, pumpkin pie, old olive, tempting turquoise
  • Ink:  basic black, markers:  real red, pumpkin pie, old olive, tempting turquoise
  • Punches:  1 1/4" Square, 1" Circle, 3/4" Circle, Medium Jewelry Tag
  • Ribbon:  black

Family Accessories

I saw a card similar to this by Arielle Gordon and decided to try it out.


This card uses the "baja breeze" paper that has previously retired but will now be coming back to order as of July 1st.  I can't wait since this is one of my favorite colors to use.


Card Recipe:

  • Stamp Sets:  Family Accessories
  • Cardstock:  whisper white, night of navy, sahara sand, certainly celery, baja breeze
  • Designer Paper:  Urban Garden (retired) - this color is baja breeze
  • Ink:  night of navy, certainly celery, baja breeze, certainly celery marker
  • Punches:  1 1/4" Circle, 1 3/8" Circle
  • Ribbon:  certainly celery
  • Other:  embossing folder from Provo Craft

Tuesday, June 8, 2010

Wedding Bliss

I have seen so many different variations of this bride and groom that I had to make some for myself.  The bride and groom are made using the "Full Heart" punch.


I started with creating my heart bride and groom.  The White heart is cut from "Scalloped Heart of Heart Embosslit" (from the Occasion Mini - still available to order) love this little embosslit.  I then embossed some whisper White cardstock using an embossing folder from Provo Craft, then punched the heart out of the cardstock.  I attached these together using 3 small brads, these brads were colored with pearl embossing powder using a fun and quick tutorial from Deena at "Be Creative" that you can find HERE.  To make the groom heart, I punched a heart out of basic black cardstock.  I then cut down the middle of the heart (almost to the point) and folded back the edges to make lapels.  I added 2 black brads and added a small amount of black ribbon that I tied in a knot.  The background paper is custom made using whisper white cardstock stamped with Wedding Bliss all over with versamark ink and embossed with the same pearl embossing powder as the brads above.  The back white layer is embossed using the Perfect Details Texturz Plate.  I really enjoyed putting this card together and trying a few additional colors. 

Here are a few blogs where I got inspiration for this card.
Stamps alot
2 stamp is 2b
Flowerbug's Inkspot
Love 2 Stamp


Card Recipe:
  • Stamp Sets:  Wedding Sweet,
  • Cardstock:  Whisper White, Basic Black
  • Die Cuts:  Movers & Shapers, Perfect Details Texturz Plate, Scalloped Heart of Heart Embosslit, embossing folder from Provo Craft
  • Punches:  Full Heart, Ticket Corner
  • Ribbon: black satin
  • Ink:  versamark
  • Other:  brads, pearl embossing powder,dimensionals
  • Cardstock Sizes:  Basic Black - 3 1/4" x 4 1/2", Whisper White - 3" x 4 1/4", 4 7/8" x 5 1/8"

Monday, June 7, 2010

Stamping Yard Sale

I have been sorting and cleaning out my stamp room.  Since Stampin' Up! has announced their new color revolution I have decided not to keep some of my supplies and to share these great items with you.  Beginning June 17th (this is stamp day/night for June) you can come look through all of the items that are available and give your favorites a new home.  These items will be priced at greatly reduced prices, I hope you enjoy!


Items that will be for sale:
  • Stamp Sets - new and used
  • Stampin' Up! Designer Paper
  • Stampin' Up! accessories
  • Scrapbooks
  • Paper Packs
  • Scrapbook Paper
  • Ribbon
  • Misc. crafting supplies
  • and many more

Friday, June 4, 2010

June Stamp Night

It's that time again - the June Stamp Class is coming up. 

Stamp Class
Thursday, June 17, 2010 at 10:00 a.m. and 6:00 p.m.
at my home 
(if you need directions please call or email me)

Please R.S.V.P. by June 14th, which time you are planning to come. 
Remember to bring your own favorite adhesive.

$10.00  for 4 different cards
This workshop includes birthday or celebration cards.

Kits:  $10 unassembled or $12 assembled.  Postage willl be added for out-of-towners.


I love holding Stamp Class workshops.  I spend a lot of time choosing the cards to make (so many choices) and preparing.  And then I get to spend time with friends that share my hobby and enthusiasm.  It really is fun.

Remember...
  • If you have not placed your final order for the current catalog, come prepared to get those stamps and accessories that you must have before the new catalog comes out.Click HERE for your "last chance" lists.
  • Do you want your own free catalog?  Sign up for one of my stamp or technique clubs for next year and receive a catalog for yourself.  Click HERE for more information.
  • The Summer Mini Catalog is still active and you can get some wonderful stamps and accessories.  Click HERE to look through this catalog.  If you are still in need of a copy for yourself, email me with your name, address,and  phone number so I can get one to you.
  • If you have missed any stamp nights this year and you are still interested in making or getting the cards, email me which month you want to get so I can put supplies together for you.  You can see posts of monthly classes HERE.


Tuesday, June 1, 2010

Ready... Set...

The NEW CATALOG is debuting July 1st, get ready to see some wonderful new products.  Please let me know if you would like a new catalog, so I can save one for you.  The cost is $5 for locals, and $10 for out of towners, which includes shipping.  If you would like a catalog for FREE, sign up now to join one of my monthly clubs and I will give you a copy as soon as I receive them.

To learn about my monthly clubs click HERE.  The prices currently listed reflect the current catalog.  As soon as I receive my new catalog I will be updating the prices of each club to reflect current prices and product. 


The wait is over...

It's that time of year again when we have to say goodbye to some old and favorite friends and hello to new ones.  

The new catalog will come out on July 1st and there are so many exciting things to look forward to.  To look forward to the new catalog, Stampin' Up! has come out with their "Last Chance" list.  These lists are the items that Stampin' Up! will no longer carry after June 30.

The "Last Chance" lists are here.

 Download Last Chance Stamp Sets

Download Retired Accessories

Download Last Chance Definitely Decorative


Some new things to know as you look at this years retired accessory list....

1.  Check out the reconfiguration list.  This means the accessories will be available in the next catalog but will be changed.

2.  Notice the other column that shows some as being DISCOUNTED!   That's exciting (Cottage Wall DSP is one, some ribbons...it's crazy!). 

Now, the accessories are first come first serve.  Some things will sell out FAST.  So if there is anything you'd like make sure you order right away.  Of course, you can always order online HERE.  The other thing worth noting is that the stamps will all be available until the end of June!

Make sure that you download each list and sit down with your catalog or visit the customer website to find those things that you must have before they are no longer available.


$99 Starter Kit

Have you been thinking about becoming a Stampin'Up Demonstrator? Or, perhaps you just love to craft with all things Stampin'Up? Maybe you just want to get your supplies at a discount?  Well . . . this may be the day you have been waiting for!! There is a special Mini Starter Kit available only during the month of June for ONLY $99!!! It has a value of over $180 . . . and I will list out the items below. However, you can always substitute a like item of equal or lesser value.
  • Watercolor Trio stamp set (wood mount) from our Summer Mini Catalog
  • I {Heart} Hearts (clear mount) from the Occasions Mini Catalog making another appearance in the 2010-2011 Idea Book & Catalog
  • Clear Mount Block C
  • Homemade single stamp (one of our Sneak Peak items)
  • 8 1/2" x 11" Whisper White card stock
  • 8 1/2" x 11" Brights Collection Assorted card stock
  • Melon Mambo Classic Stampin' Pad
  • Daffodil Delight Classic Stampin' Pad (one of our Sneak Peak items)
  • Rich Razzleberry Classic Stampin' Pad
  • Tempting Turquoise Classic Stampin' Pad
  • Basic Black 1/8" Taffeta Ribbon (one of our Sneak Peak items)
  • Color Coach (another Sneak Peak item!)
  • SNAIL Adhesive
The Mini Starter Kit also includes the same business supplies that are in the Standard Starter Kit and as a new demonstrator who joins in June, you will receive a FREE BOX of 2010-2011 Idea Book & Catalogs during the first part of July! That's an over $30 BONUS!


If you would like to get started on-line and today . . . just click JOIN NOW.  I look forward to providing help and support as you begin your new adventure with Stampin' Up!

Tuesday, May 18, 2010

Calling all New Moon Fans!

I recently just ran across this webpost at "Crafting with Class" with a post dedicated to New Moon.  As I kept reading down the page I found this card and I could not help but laugh right out loud.  I thought that this was a great card, made from some wonderful inspiration.  I hope that you all find this as enjoyable as I did.  Some people are just amazing and so very creative.

Saturday, May 8, 2010

May Stamp Class

It's that time again - the May Stamp Class is coming up. 

Stamp Class
Thursday, May 20, 2010 at 6:00 p.m.
Saturday, May 22, 2010 at 10:00 a.m.
at my home

Please R.S.V.P. which day you are planning to come. 
Remember to bring your own favorite adhesive.

$10.00  for 5 different cards, 1 gift card holder, and a special surprise.
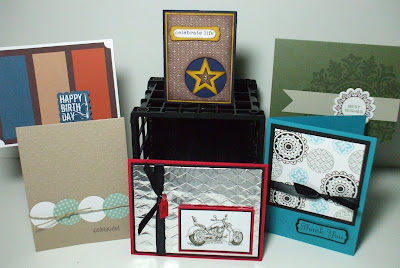
This workshop includes masculine cards.

Kits:  $10 unassembled or $12 assembled.  Postage willl be added for out-of-towners.

I love holding Stamp Class workshops.  I spend a lot of time choosing the cards to make (so many choices) and preparing.  And then I get to spend time with friends that share my hobby and enthusiasm.  It really is fun.

Wednesday, May 5, 2010

Retiring Colors Update

With our recent Color Renovation announcement, Stampin' Up! has experienced a spike--much greater than anticipated--in demand for some of our retiring colors. A significant number of colors in both card stock and re-inkers have gone into backorder status and a few have even sold out completely.

Stampin' Up! anticipated increased demand on retiring colors based on historical sales information for previous color transitions, as well as current buying behaviors. Obviously, even with the most careful planning, the response to a transition of this nature can surprise everyone--and it has!

For re-inkers in retiring colors, as we run out, they will be placed on backorder status and those orders will be filled as quickly as we receive the product. We will continue to do this to the best of our ability through May, and then the re-inkers will be available while supplies last in June.

Card stock presents a bit larger problem, as the process of ordering and producing new paper from the paper mills is very involved, and SU! can't order significant quantities at this point in time without putting the production of the new colors in jeopardy (and we know you want those!). To help us be able to provide you with the card stock in the retiring colors for as long as possible, SU! will be substituting textured paper for some of the smooth colors--including card stock in 8 ½ x 11 as well as 12 x 12--where the smooth is no longer available. When colors are out of stock, we will be filling as many of those as possible with textured card stock. Because the demand for each color varies, we are unable to provide a list of what colors of card stock will be substituted with textured, or at what point that will happen. However, if you receive a package of card stock that is textured instead of smooth, there will be a sticker on the package indicating that change. There will be no change in item code or price for these substitutions. Four colors have already sold out of smooth 8 ½ x 11 and we have no idea how fast cardstock will now sell out.

Please keep in mind that an instance may arise where we are unable to fill orders on a specific product, and it will become unavailable before the end of May, but we hope those cases will be minimal. Our main goal is to serve you the best that we can. 

If you had any plans to order to order any of our retiring colors, I strongly suggest you do so as soon as possible or you may find you will be unable to get your favorites very soon.

If you are a fan of our full size Craft pads, remember that they will only be available in Whisper White, Very Vanilla and Basic Black beginning July 1 and they may also sell out quickly.  You will be able to purchase uninked large Craft pads and re-inkers to make your own pads and they will be available in Stampin' Spots.  However, you may want to purchase the full-size Craft pads before they are sold out (as well as the Craft Re-inkers for retiring colors).  They are fabulous for scrapbooking as they last longer and won't hurt your photographs.  Here is more information on our Craft Ink:

  • Pigment ink
  • Coordinate with exclusive card stock, pastels, and markers
  • Slightly raised foam pad
  • For use in scrapbooks as well as on wood, fabric (contact me for details), and other craft items
  • Opaque look on colored card stocks
  • Great for embossing
Please do not hesitate to contact me if you have any questions about these issues and I will be happy to help you out.  If you want to see the retiring color list again, please CLICK HERE.  Happy Stamping!

Saturday, May 1, 2010

The Summer Mini is here!

As we begin a new month of spring, scrapbooking and graduation, we also get to see and play with tons of new stamps and accessories that inspire everything summer.  You can finally view this wonderful mini catalog and discover all of the new product that made just for you.  Please click the link below the catalog cover to see everything for yourself.


If you would like to have a catalog for yourself that you can curl up with and hold in your hands EMAIL ME for your free copy.  U.S. only, please.


I WANT TO KNOW!  What's at the top of your Summer Mini "must-have" list?  Do you find the Sweet Scoops stamp set delicious?  Perhaps Tropical Party stamps and coordinating summer accessories call out to your party animal?  Or do the Elements of Style stamps ignite your love for all things vintage?  Please leave me a comment with your favorites below.

National Scrapbooking Month

May is National Scrapbooking Month and Stampin' Up! has a wonderful promotion to help you move your scrapbooking to a whole new level.


You can watch a video from Stampin' Up! for some great scrapbooking ideas.  Click here!


For the entire month of May when you purchase a qualifying scrapbooking stamp set or the My Digital Studio software you can  receive a FREE package of Designer brads--choose from four designs! 


Click on each description to see pictures of each item.

Stamp sets

 Page Description Wood-Mount Item  Wood-Mount Price  Clear-Mount Item  Clear-Mount Price 
 81 115181  $26.95  ---  --- 
119  114389  $27.95  ---  --- 
128  113706  $27.95  ---  --- 
129  115778  $28.95  ---  --- 
12*  118611  $27.95  120045  $19.95 
13*  119910  $27.95  120105  $19.95 
13*  119900  $27.95  120099  $19.95 
14*  118659  $26.95  120072  $18.95 
22*  118513  $23.95  120075  $17.95 
25*  118521  $23.95  120051  $17.95 
25*  120152  $23.95  120154  $17.95 
*From Summer Mini Catalog
**Last Chance stamp set!

My Digital Studio software

 Page Description  Item  Price 
32*  My Digital Studio  118108  $79.95 
*From Summer Mini Catalog

Designer brads

Page  Description  Item   Retail Price  Price with Qualifying Purchase
179 112579 $5.95  FREE 
179   112577  $5.95  FREE 
179  112571  $5.95  FREE 
179  112572  $5.95  FREE 


Sunday, April 25, 2010

Marker Storage


There are so many colors that are retiring, "what do I do with all of my old markers," you ask?  I have the perfect solution.  I got this idea from reading some post somewhere and have been storing all of my single markers this way for a long time.  

This is great solution because you get to recycle and still have all your markers at your finger tips.  I decided to use some colors that will be leaving soon that I hate to see go.


To all of you who wonder how this is made please continue down the page.


The first thing you will need is an empty drink container.  This is the container that has 5 small tubs that you mix up in a pitcher.  There are many different flavors that you can get in these tubes.  Instead of just throwing them away when you have finished your drink, recycle them into a perfect marker storage.  Make sure that you take the wrapper off so that you can cover it with your own favorite color.


Cut card stock to 6" x 9".  I used Lovely Lilac on this tube.  I then took the Circle Circus stamp set and stamped with Basic Black, Lovely Lilac, and Whisper White (craft) ink for the design.
We are now going to attach it to the drink tube.

Using the Tombo Multi Liquid glue place about a 1/2" of glue all along the length (I put this where the label was attached, sometimes there is a little adhesive left that helps hold it in place and covers up anything left over.)

 
Take your card stock and place it over the glue and hold a few seconds until it doesn't move. 

Next place about a 1/2" of glue on the other end of your card stock. 


Roll the tube as tight as you can without the glue letting go.  Line up the edges as you place the open end on top of the glued down edge.  
 

Make sure that you hold this together for a few minutes until you know the glue will hold.

Set this aside, we will come back to it in a few minutes.  We need to cover up this paper seam to finish it off.


You will need to cut about 6 1/4" of satin ribbon and get your heat gun.  We are going to melt the edges so they don't fray.

The best way I have found to do this is to turn on the heat gun and run it for a minute or two to make sure that it is very hot.  Make sure that you are careful with this next step because it goes very fast.  

Place your ribbon down on a piece of paper on your work surface.  Hold the ribbon in place as you slowly move your heat gun toward the ribbon. As soon as the heat hits the ribbon you will see the ends begin to melt.  This only takes a few seconds when it is hot (be very careful that you don't melt to much or you won't have enough ribbon to cover your project).

Once you have melted both sides then turn your ribbon over and run a strip of snail on the back to adhere to your project.

Take the ribbon and line it up at the top of the seam and run it all along the paper seam to cover it up.


Hurray!  Now doesn't that look great.  Now you are ready to fill it up and get started with organizing.  I usually take the lid for the tube and place several glue dots on the inside of the lid and attach it to the bottom as a base.  The glue dots are just to hold it together to make that I don't loose the lid so I can use it later if I want for other projects.

When using these tubes for markers I lay them down since it is best to store markers laying down so that the ink does not run to one end of the marker and dry out the other end.  Even when they are laying down they don't have to take up tones of space because they stack nicely in a small area.

I needed three different tubes since there are so many markers that will be gone, I just can't say good-bye to any of them right now.  I have several single markers, glue pens, blenders, and a versa marker and this makes a perfect place to store these items as well.  I decided to a few colors that I hate to see leave.


If you have any questions about these marker tubes feel free to send me an email or post a comment below.


Click here to order Stampin' Up! products.


Recipe:
  • Stamp: Circle Circus
  • Card stock:  Lovely Lilac, Sage Shadow, Cameo Coral  - cut 6" x 9 1/2"
  • Ink:  Basic Black, Whisper White (craft), Lovely Lilac, Sage Shadow, Cameo Coral
  • Accessories:  black satin ribbon, empty drink tube

Paper Bag Purse

 
Here is a fun little paper bag purse.  When I first saw a template for this purse I fell in love with it.  I finally have been able to make one for myself.  I love how great it looks with just about any paper you choose and can customize it to any person, event, or holiday.


You can find the directions on how to make it here from Becky Roberts of "Inking Idaho."


I have really began to enjoy this "In-Color," Bermuda Bay, and hate to say good-bye come July 1st.  If you like it as much as I do you only have 2 more months to order before it is gone forever.


Here are some close ups.  
You  can click on any picture to make it larger.

Friday, April 23, 2010

Daisies - Top Note

I have seen tons of things made with these daisies (die cut) and wanted to make something for myself.  I saw this great idea on Becky Roberts blog from a friend and decided to put my own twist on it and try it for myself.    


 This one uses Real Red paper.


This one uses Rose Red paper.


I decided to make this in two different colors.  This way my stampin' gals could choose which color they would like better.


Card Recipe:
  • Die Cuts:  Daisies #2, Top Note Die
  • Cardstock:  whisper white, old olive, real red, so saffron, rose red
  • Designer Paper:  paper from craft store
  • Punches:  5 petal flower, 1/2" circle

Razzleberry bird

Loved this idea from Nancy Riley so I had to change it a little and make one myself.  This card can be used for almost any occasion.  I hope that you enjoy!


Card Recipe:
  • Cardstock:  whisper white, old olive, rich razzleberry, orchid opulence
  • Designer Paper:  Cottage Wall
  • Punches:  Extra Large Two-Step Bird, Trio Flower
  • Die Cuts:  Little Leaves
  • Other:  3 1/2" circle (circle cutter),  4" scallop circle is cut with my cricut machine

Butterfly Flight


 I cut the whisper white card stock with a window in the middle.  I cut the window leaving a 1" border around the outside.  I then cut the card stock to 5 1/4" x 4" with a 3/4" border for the window.  I then cut a 3 x 3 square to stamp the grass and butterfly and glued in behind the window.  I stamped the sanded background with chocolate chip ink on kraft paper and then sponged chocolate chip ink on the the side.  I tied chocolate ribbon around the kraft paper and then blued this layer on the white.


Here is another layout just a different direction.


Click here to see the inspiration for this card.


Card Recipe:
  • Stamp Sets:  Inspired by Nature, Flight of the Butterfly, Sanded Background
  • Cardstock:  whisper white, kraft
  • Ribbon:  chocloate chip
  • Ink:  chocolate chip, old olive, pumpkin pie

Round flowers

As I was visiting some of my favorite blogs I came upon Becky Roberts' post of this wonderful card.  I knew that I must copy it right away and share it with my stampin' gals.  I think that I want to try this same look in Perfect Plum next time.


Card Recipe:
  • Top Note Die
  • chocolate chip, old olive, rose red, whisper white card stock
  • Inspired Nature stamp set
  • chocolate chip satin ribbon
  • Boho Blossoms Punch
  • 1 1/4", 1", 3/4", 1/2" circle punch
  • large oval punch (leaves)

Top Note Purse

I have loved seeing these little purses made from the top note die.  I finally made some for myself.


 I have loved using this "Cottage Wall" designer paper and hate to say good bye to it in a couple of months.


Here are a few of my favorite inspirations for this idea.
Jill's Card Creations
Perrywinkle Press 
Flowerbug's Inkspot 
Stamp with Tami (video tutorial)
Splitcoast
Splitcoast


Card Recipe:
  • Top Note Die
  • Cottage Wall Designer Paper
  • Ribbon
  • Boho Blossoms Punch
  • 1/2" circle punch
  • silver brads

Thursday, April 22, 2010

Circle Purse

I fell in love with this little "Circle Purse"  when I saw it on "My Chic n' Scratch", and I just had to give it a try.  I decided to try my own version with some colors that are going to be leaving.  You can find the instructions and video to make this here.  You can find instructions to make the flowers here.


  I love how I can fill it with some little treats, coupons or some small 3x3 cards for mom or someone special. You can use any of your favorite colors and make a special purse perfect for anyone. 


Here is another one I tried using Night of Navy.


Measurements:
  • (2) 6" circle card stock
  • 5 1/2" matching Designer Paper
  • 1/2" x 6" strip coordinating card stock
  • cut lunch bag at 3 1/4"  (4 3/4" wide)
  • cut circle at 5 1/4" (cut off 3/4")

Recipe:
  • Circle Scissor
  • Designer Paper (mellow moss, night of navy) - cut 5 1/2" circle
  • Card stock:  mellow moss, regal rose, close to cocoa, whisper white, real red  - cut (2) 6" circle
  • Punches:  circle scallop, large oval , 5 petal flower
  • ribbon
  • brads, rhinestone, lunch sack, bone folder


Sunday, April 11, 2010

2 Classes for April!

April Stamp Night

I finally have pictures to share with you so you can see what we will be making in this months stamp night.

All of these March and April showers are sure to bring May flowers and you can get a start with some flowers of your own.  Come learn how to use some of the new items from current catalogs.  When you share these creations with others they they are sure to see how much you care.

You are always welcome to bring friends with you to our stamp nights.  Just make sure you RSVP for everyone so that I make sure I have enough supplies for everyone.


Card Class: Thursday, April 22, 2010 5:00 PM
  • Make 5 "All Occasion" cards.
  • One additional surprise project.
  • Cost is $10.00 for this class. You will need to bring your own adhesive.
  • Registration Deadline: April 20, 2010


Scrapbook Class: Wednesday, April 27, 2010 5:00 PM

  • Make 2 12x12 two page spreads.
  • Cost is $10.00 for this class. You will need to bring your own adhesive.
  • Registration Deadline: April 24, 2010 

    Bubbles

    Copyright Info

    Text, images, concepts, and designs © Allison Whiting; All rights reserved. Nothing may be copied or changed without requesting permission from myself alone. My original artwork is for personal inspiration only and may not be copied for publication or contest submissions. Most products used are Stampin' Up!® 1990-2008, unless otherwise specified.

    Total Pageviews